I started gardening when I was 5 years old, but I can still remember many of the mistakes I made. I am still making mistakes now! They are just different mistakes than the ones which new gardeners often make. Every gardener will tell you that the garden is not a static nor stable place, it is always changing. I have been looking over some photos of when we first moved to our home, and the transformation has been amazing.
As I look through these old photos, I am constantly reminded of mistakes I made early on. And I wish I could go back and change a few things. You know, remove a tree here, do not plant a tree there. Now as I ponder my garden spaces, I think about the many things I want to get done this winter, but know that I may only get about 10% done. But what mistakes do new gardeners make more so than experienced gardeners?
1 Lack of Planning
This is probably the biggest mistake that ALL gardeners make, not just beginners. I make these kind of mistakes every year. Planning for the future is very important. If you fail to plan ahead, most of the other mistakes will follow. But planning does not mean just writing everything down or making a design. It NEEDS to start at home.
If you have never gardened before, then you need to make a plan for what kind of garden you want to start with. Are you wanting to grow your own food to eat? Do you want flowers? Do you want a full blown landscape with trees, shrubs, perennials, and annuals? Are you going to make a container garden? If you are doing something bigger, then you need to go outside and take a serious look at your space.
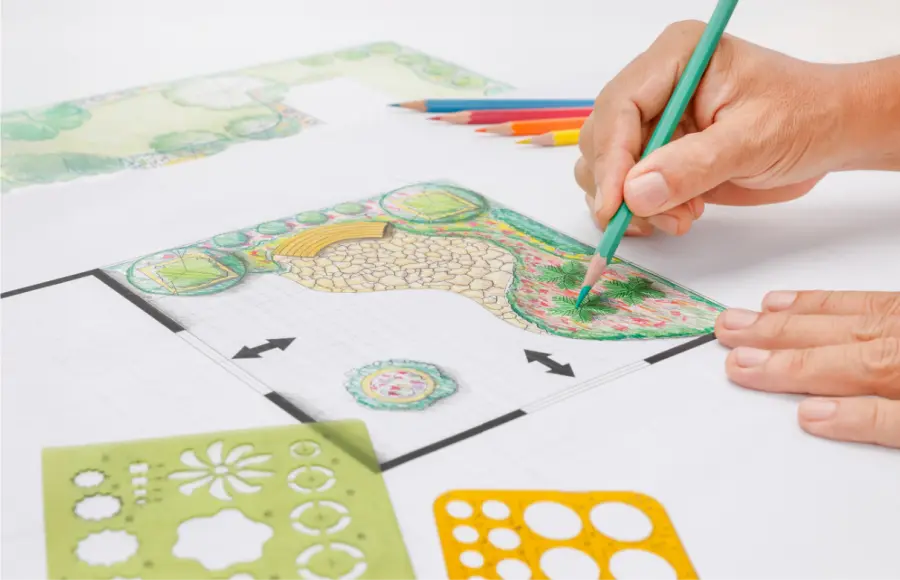
Visualize
You must visualize what you want your space to be like before you ever consider a plant or a plan. New gardeners are often impulse buyers, with no plan in place, just a new plant and nowhere to put it. By visualizing your space first, you can begin to develop the ideas you want to incorporate into the garden space. I would start with some magazines and books before choosing plants. You need to think about pathways, gathering spots, bed sizes, and lawns. Do not take the whole lawn out at once, start small.
Once you begin to see what you want the garden to look like (someday), you can think about whether or not you need a designer or a drawing. Now, I will caution you on designers. They will want to push some of their ideas on you and tone down your ideas to be more practical. If you are a DIY person, then you probably will not want a designer. But if you want a more structured landscape, with less maintenance, then choose a designer to help.
More Than Just a Plan
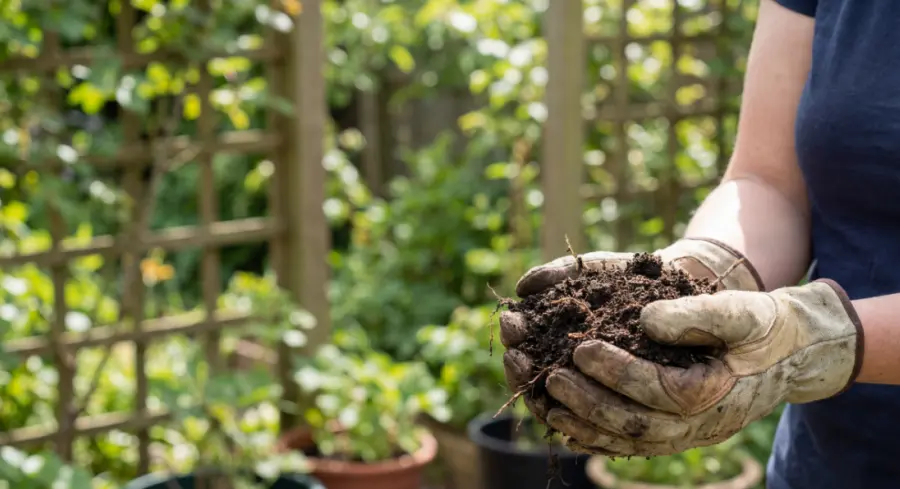
Once you have your ideas down, either on paper or in your mind, there are a few other things to think about before buying plants. What kind of soil do you have to work with? One of the biggest reasons new gardeners fail is because they do not know anything about their soil and whether or not they need to fertilize. If you are planning to remove lawn to plant flowers, then what is your plan for that? If it is using a herbicide, forget it. You will cause more harm. Remember to start small.
When you are starting new, then you need to start small. If you are creating a vegetable garden or cutting garden, it it okay to till the ground to start, but do not plan to continue doing that. Tillage disrupts the soil texture and destroys microorganisms. It also constantly brings weed seeds to the surface while creating a compacted layer just below the tillage area where roots can not grow.
I recommend planning to kill grass or weeds in large patches with tarps, cardboard, or heavy clear plastic. Clear plastic can heat up the soil to the point that weeds suffocate and seeds break down due to heat. Tarps will block sunlight and kill weeds (but not all) by limiting moisture and light. Tarps must be left in place for at least 4 months during the growing season. Cardboard can be used anytime, and just mulched over, then planted into whenever you are ready.
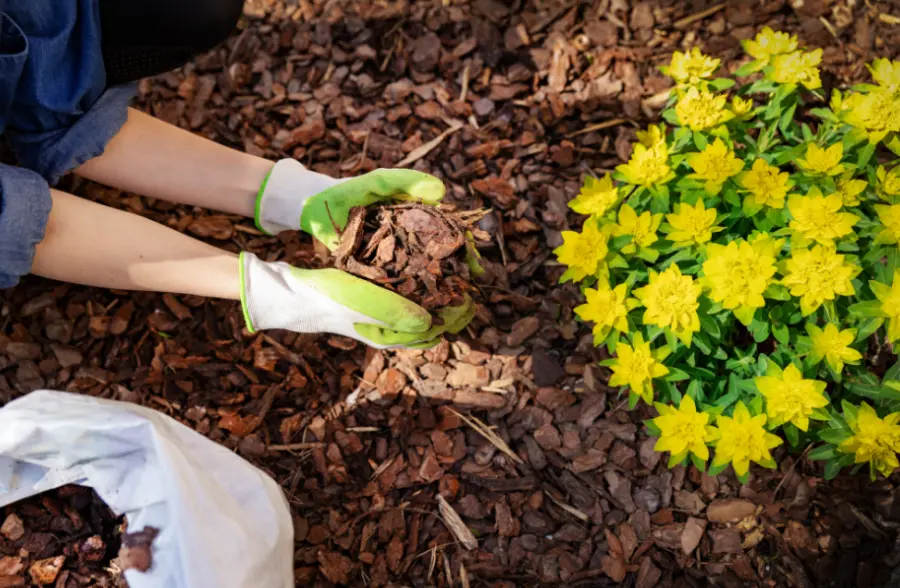
Building Soil Organic Matter
If you want to create a garden that rebuilds itself each season, and will be sustainable in the long run, then you need to build soil organic matter. This is also a carbon sink, able to hold carbon within the soil. If you plan to keep tilling, then you risk destroying organic matter and releasing carbon from the soil. To increase soil organic matter, lock down carbon, and increase the activity of microorganisms, add the following materials to the soil surface in layers each season:
- Brown cardboard (not shiny or white, or colored)
- Organic mulch (straw, partially composted hay, finely chopped woodchips, sawdust (in small amounts), chopped leaves)
- Crushed eggshells
- Coffee grounds
- Compost
If you are building flower beds with perennials and shrubs, then consider adding hollow or fallen logs or driftwood. Put these logs in between shrubs and perennials. They become a home for insects and wildlife as they break down, releasing nutrients from the formerly dense wood into the soil.
2 Wrong Plant, Wrong Place
This has become one of the biggest mistakes made by gardeners, both new and experienced. People keep putting plants in the wrong place. A lot of this falls back onto garden magazines and shows, where plants are added or grouped together in unnatural groupings, often pairing water lovers with drought lovers. Or putting hostas (shade) next to coneflowers (sun).
Mistakes like these add up in the garden, with plant death. And many new gardeners think that they have failed or that they killed their plants. They did, but not knowing where to put plants does not fall completely on them. The garden center salespeople, the coaches, the teachers, we have failed them. We need to stress the points on proper placement of plants.
And it is not easy for any gardener to completely know every microclimate within their landscape. Some places might be hot, but shady and dry. Other spots could be full sun, but wet from the lay of the land or a sump pump outflow. I have a spot in my landscape where the subsoil is at the surface because I did not fill back in correctly after fixing the septic line.
Place it Right, The FIRST Time
Before we buy any plants we need to know our landscape and what it has for soil and sun. Areas which have full sun in winter (when mot gardeners plan) are not usually in full sun in summer, because the sun moves northward during the summertime. Get a survey map and check the land to see how water flows across it. Sit out outside during a rainstorm. Watch the garden when the wind i blowing more than 15 mph. Locate sump pump outflows, and where downspouts lead to. If you do not have gutters, then where the rain lands as it comes off the roof will be a tough place to put plants.
Once you have these things figured out, you be better prepared for choosing plants for the garden. But remember that plants grow and change over time, and they can alter the way wind and water move through the garden.
3 Does it Have Enough Room to Grow?
A lot of the time, even if a plant is in the right place according to water and and light conditions, it is in the wrong place because of maturity. Most plants will get bigger than the tag suggests, especially trees and shrubs. And trees cannot easily be removed and replanted in a new place. I still recall one of my mistakes, where I planted a baldcypress tree within 12 feet of my house. Well, after 2 years I realized it was in the wrong place, but by then it was too big to move to a new location. All I could do was cut it down.
One of the other mistakes I made in my own garden was not removing a silver maple in the front yard. It is still there, and it gets bigger each year. It is less than 20 feet from the house, and already shades the house and driveway. If I had been using my brain when we moved there, I would have removed it and planted something farther away from the house. Instead, I left it and now face annual pruning to keep it away from the house. Sure, I could cut it down, but it would change the whole microclimate of the front yard.
Perennials and annuals are much more forgiving when it comes to mistakes of planting them too close to other things. But shrubs will be lopsided and trees will stretch if too compacted by other trees. And if it is too close to the house or another structure, you may be forced to cut it down before it reaches maturity. Make sure you are reading the labels for size and allowing an extra 10-20% growth on shrubs and trees over time.
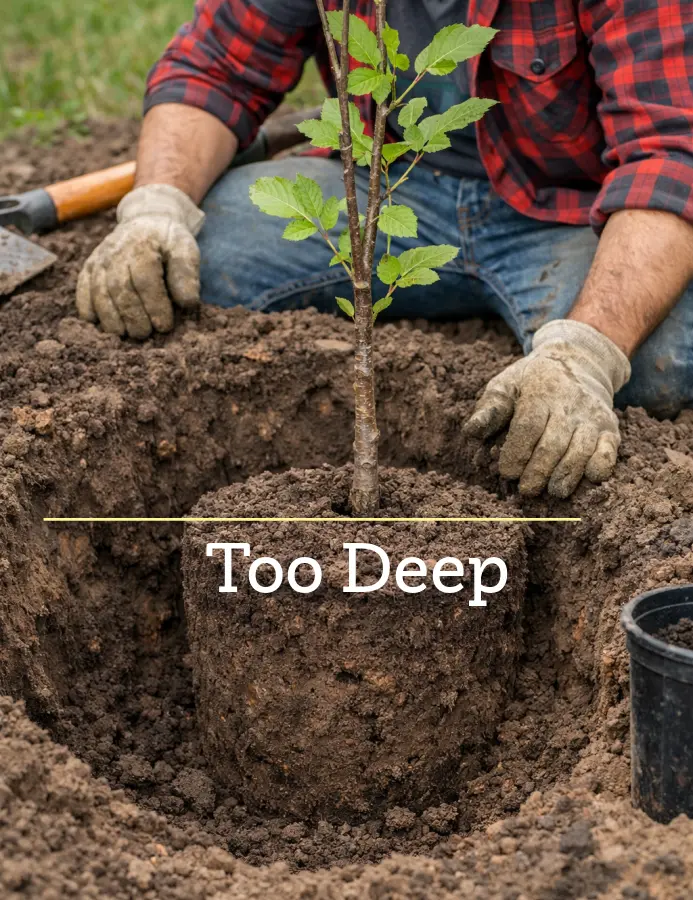
4 Did You Plant it Correctly?
I look at a LOT of trees each season. It is one of those things I really enjoy doing. I love to help people grow trees. But one of the most common things I find in newly planted trees is incorrect planting. Too deep. Too shallow (sometimes). Planting has become one of the big mistakes new gardeners make each season. I remember once in high school and I was working on planting plugs with kids in a school project. One of the girls in my group asked me which way was the right way to plant, roots up or roots down? And she was not joking with me either.
Planting incorrectly not only affects the current health of the plant, it can affect a plant's ability to thrive and its longevity. If you bury the root flare of a tree at planting, then you risk losing that tree to rot and decay as moisture sits around the trunk. The root flare is where roots meet bark and if it is not exposed to air, it will build up moisture and lead to decay and then insects/diseases will follow. Shrubs are similar to trees. They have a flare, though not as prominent. If you cover it up the shrub will struggle to live.
Perennials and annuals are again more forgiving than trees and shrubs, but they too can die from being planted either too deep or too shallow. Unless an expert tells you otherwise, put plants in the ground at the level they are in the container. Watch out for trees in plastic containers - if the root flare is not visible, then remove excess soil to find it, and plant it with the flare at or slightly above ground level.
5 Watch Out for Watering!
Just like other gardeners, I am still making mistakes and learning about watering. Just 2 years ago I went to a presentation on trees in the Kansas City region. The specker, who is called the "plant professor" by his local company, talked about how he waters newly planted trees. And it hit me why we have more tree deaths on new trees than old trees. It is because we do not water correctly at the start! And the same could be said for all plants, including annuals, perennials, and shrubs.
Watering or underwatering is a mistake commonly made by all of us, not just new gardeners. But it is no surprise, considering the water requirements of different plants can be very different. When I worked closer with the designers, I would see a lot of unnecessary replacements in new landscapes. It was because the homeowner was relying on the irrigation system to take care of new plants, versus watering themselves.
Irrigation
But irrigation systems are meant to be a back-up for established plants, during periods of drought. Not as the main watering tool for newly installed plantings. So what do homeowners usually do when plants are stressed from lack of water? They turn UP the water. And the plant becomes dependent on that trickle, instead of building a root system that can search deeper for water.
The only time I recommend supplemental irrigation (drip zones, soaker hoses, or sprinklers) in landscaping, is when you are planting and growing annuals or vegetables, which typically have a shallow root system. Lawn irrigation is okay as long as your installer directs zones away from trees (leave trees 10 feet or more beyond the 5 year projected drip line), as too much water in the root zone can leave many trees stunted.
Correct Watering
For newly planted trees, shrubs, and perennials, I recommend watering until water runs out of the planting hole, after planting. Water should be soaking into the soil and around the plant. In some cases, it may take 15 minutes to water a small tree, because the soil around it is dry. Do not put the pressure on high either! Water should be coming out of the hose at just a little faster than a trickle. About the speed of your sink faucet. This is the FIRST watering.
For the second, and all subsequent waterings, repeat the actions of the FIRST watering. To determine if it needs watered, check the hole twice weekly during spring, and daily during summer. If the soil is dry and warm in the planting hole, then you NEED to water right away. If the soil is cool and slightly moist, then wait and check again the next day. Wait until the soil begins to feel dry in the hole before rewatering. You can do this with your fingers, or get a soil moisture probe.
For annuals, water with the same pressure, but soak not only the planting hole, but the soil around them for several inches around each plant. Repeat the process every other day if you do not have irrigation or a soaker hose on them. Because annuals are shallow rooted, soaker hoses do work for watering them, as long as the time is set for once per day or every other day. Check the annuals weekly to see if they are drying out in between watering or staying too wet, then adjust your timer.
6 Mistakes in Mulching
Knowing how, when, and what kind of mulch to use in your garden is one of the mistakes many new gardeners make. Mulching is important for a lot a reasons, but the biggest are to conserve soil moisture around plants, and to keep weeds down. I come across a lot of vegetable gardens that are not mulched, and I see people tilling or hoeing, when they could be resting.
And mulch can help prevent soil splash, which would result in disease. Tomatoes are known to get a disease (blight) from soil-borne bacteria, which can be prevented by putting a heavy layer of mulch down around them.
What Type of Mulch to Use Where
In the vegetable garden, you may have as many options as you want, unless you are a neat freak and want everything looking tidy. For vegetables, I recommend using straw, spoiled or partially composted hay, dried grass clippings, partially composted sawdust, shredded newspaper, chopped leaves, or alfalfa. You can use wood chips, but it may be more practical to use the above materials, unless you have access to a tree company's pile or chip drop. Mulch in the vegetable garden should be applied 3 to 6 inches deep in most cases.
For landscaping, you can use whatever you want, but most gardeners choose wood chips. I do not recommend using dyed mulches for flower beds, only walkways. Among your flowers, if the beds are already made, but not mulched, I recommend putting down a layer of cardboard around the plants first. This will smother weeds and add to the organic matter composition of the soil. Then apply your wood chips, chopped leaves, chopped hay, or compost. And yes, you can use compost as mulch, but it will need re-application every year. You can usually get 2 to 3 years out of wood mulch before needing application.
7 Did You Spray That Bug?
I see this a lot, with gardeners of all classes, new and old. They see a "bug" and ask "What should I spray it with?" We have been trained by ads and commercials and so much more that bugs are bad in the garden. But I am hopeful for the future, as gardeners take a step back and instead begin to ask "How does this impact my garden?"
Insects and other pests (diseases) are often handled in ways that create mistakes which make it worse down the road. What happens if you see a few aphids on milkweed and spray them with a non-target insecticide? Some of the aphids will die, but not all. You did manage to kill the developing monarch butterfly, a praying mantis, and several lady beetle larvae. Now, the aphids, who can multiply much quicker than predators, are taking over the plant and killing it.
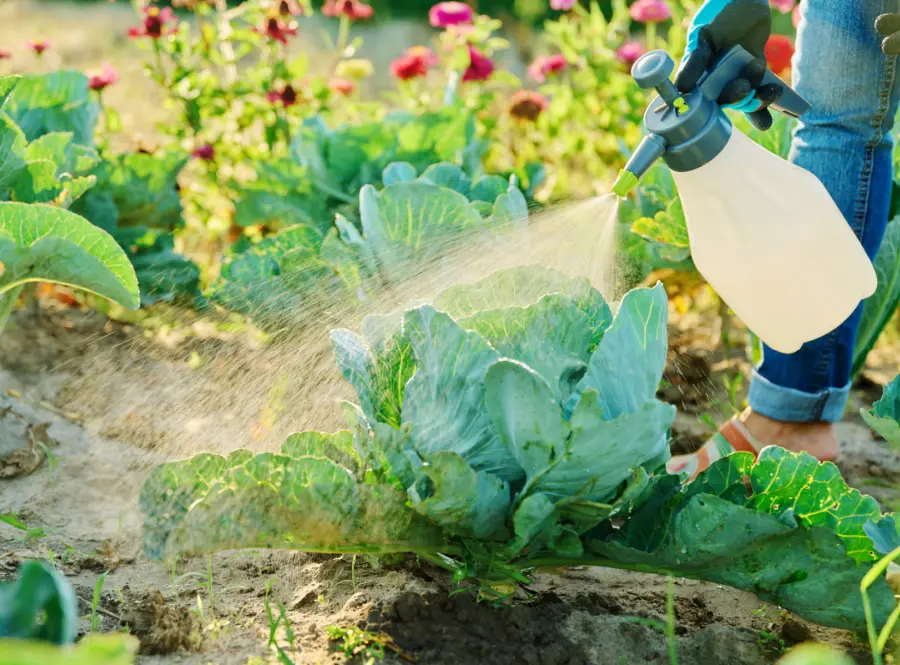
- What you should have done: If you see aphids, check the whole plant for other things, such as lady beetles and their larvae, lacewing eggs and larvae, and soldier beetles. These are just some of the insects which feed on aphids. In 2025, I found a multitude of aphids on dwarf flowering almond in the nursery. Instead of grabbing the spray, I let nature take over. I watched as soldier beetles and lady beetle larvae devoured the aphids. In a few short weeks, the aphids were gone, and the plants were fine.
Always Learn What Something is Before Taking Action
Know your problem. If you just see "something" and go grab the first chemical that says insecticide or fungicide, and spray, then you will be making more problems down the road. All gardeners need to learn what the potential pests are, but also what the predators of the pests are. Often too, if you see a caterpillar, then it might be your favorite butterfly. Do not spray unless it is absolutely necessary. The only insects and diseases I bother treating for customers are:
- Bagworms (few natural predators, even birds rarely go after them)
- Japanese beetles (only of fruit trees)
- Emerald ash borer (treatment is an injection that does not harm most other insects)
- Pine & spruce diseases
8 What About Maintenance?
The last set of mistakes that most new gardeners do is to forget about maintenance or long-term care of the plant. What does the plant need over time in the garden? When should it be pruned, or cut back, or fertilized? Each plant has its own requirements for these things. Now, if you have properly planned and placed and watered your plants, then things like fertilization will not be so hard. Most trees, shrubs, and perennials rarely need any fertilization, unless it is with compost. Some that do require a little extra feeding include:
- Roses
- Hydrangeas
- Clematis
- Boxwood
- Azalea
- Rhododendron
- Daylily
- Sedum
- Evergreens
- Fothergilla
- Sweetspire
- Holly
- Fruit trees
When Should I Prune?
By learning when to prune shrubs, you can avoid mistakes that would mess up flowering and fruiting. Some shrubs should only be pruned in the spring, others only after flowering. You will need to learn which ones bloom on old or new wood, and whether they should be partially pruned (panicle hydrangeas) or cut to the ground (beautyberry).
When it comes to cutting back perennials to prepare for the next season, I like to do certain ones in the fall and the rest in spring. Though they all can be cut in either spring or fall. In the fall, I prefer to cut down and cleanup hosta, daylilies, iris, lilies, amsonia, coreopsis, salvia, peonies, and hardy hibiscus. Everything else can wait until spring.
Fruit trees, crabapple, maples, and oaks should be pruned during winter months. Everything else can be pruned anytime. And evergreen shrubs are best pruned or sheared in May and again in November.

Conclusion
We all will continue to make mistakes, and learn as we garden. As everything changes around us, it can be difficult to keep up with all the new things coming in the garden. New plants, new colors, new ideas. But as long as we all admit that making mistakes is a common thing, and we learn from them , then we will be happy doing it.
Happy planting!